I had the honor of collaborating with Joe Goodkin again, this time on his music video for the single “Love Is a Stupid Word” off his new album Consolations and Desolations.
More soon…
I had the honor of collaborating with Joe Goodkin again, this time on his music video for the single “Love Is a Stupid Word” off his new album Consolations and Desolations.
More soon…


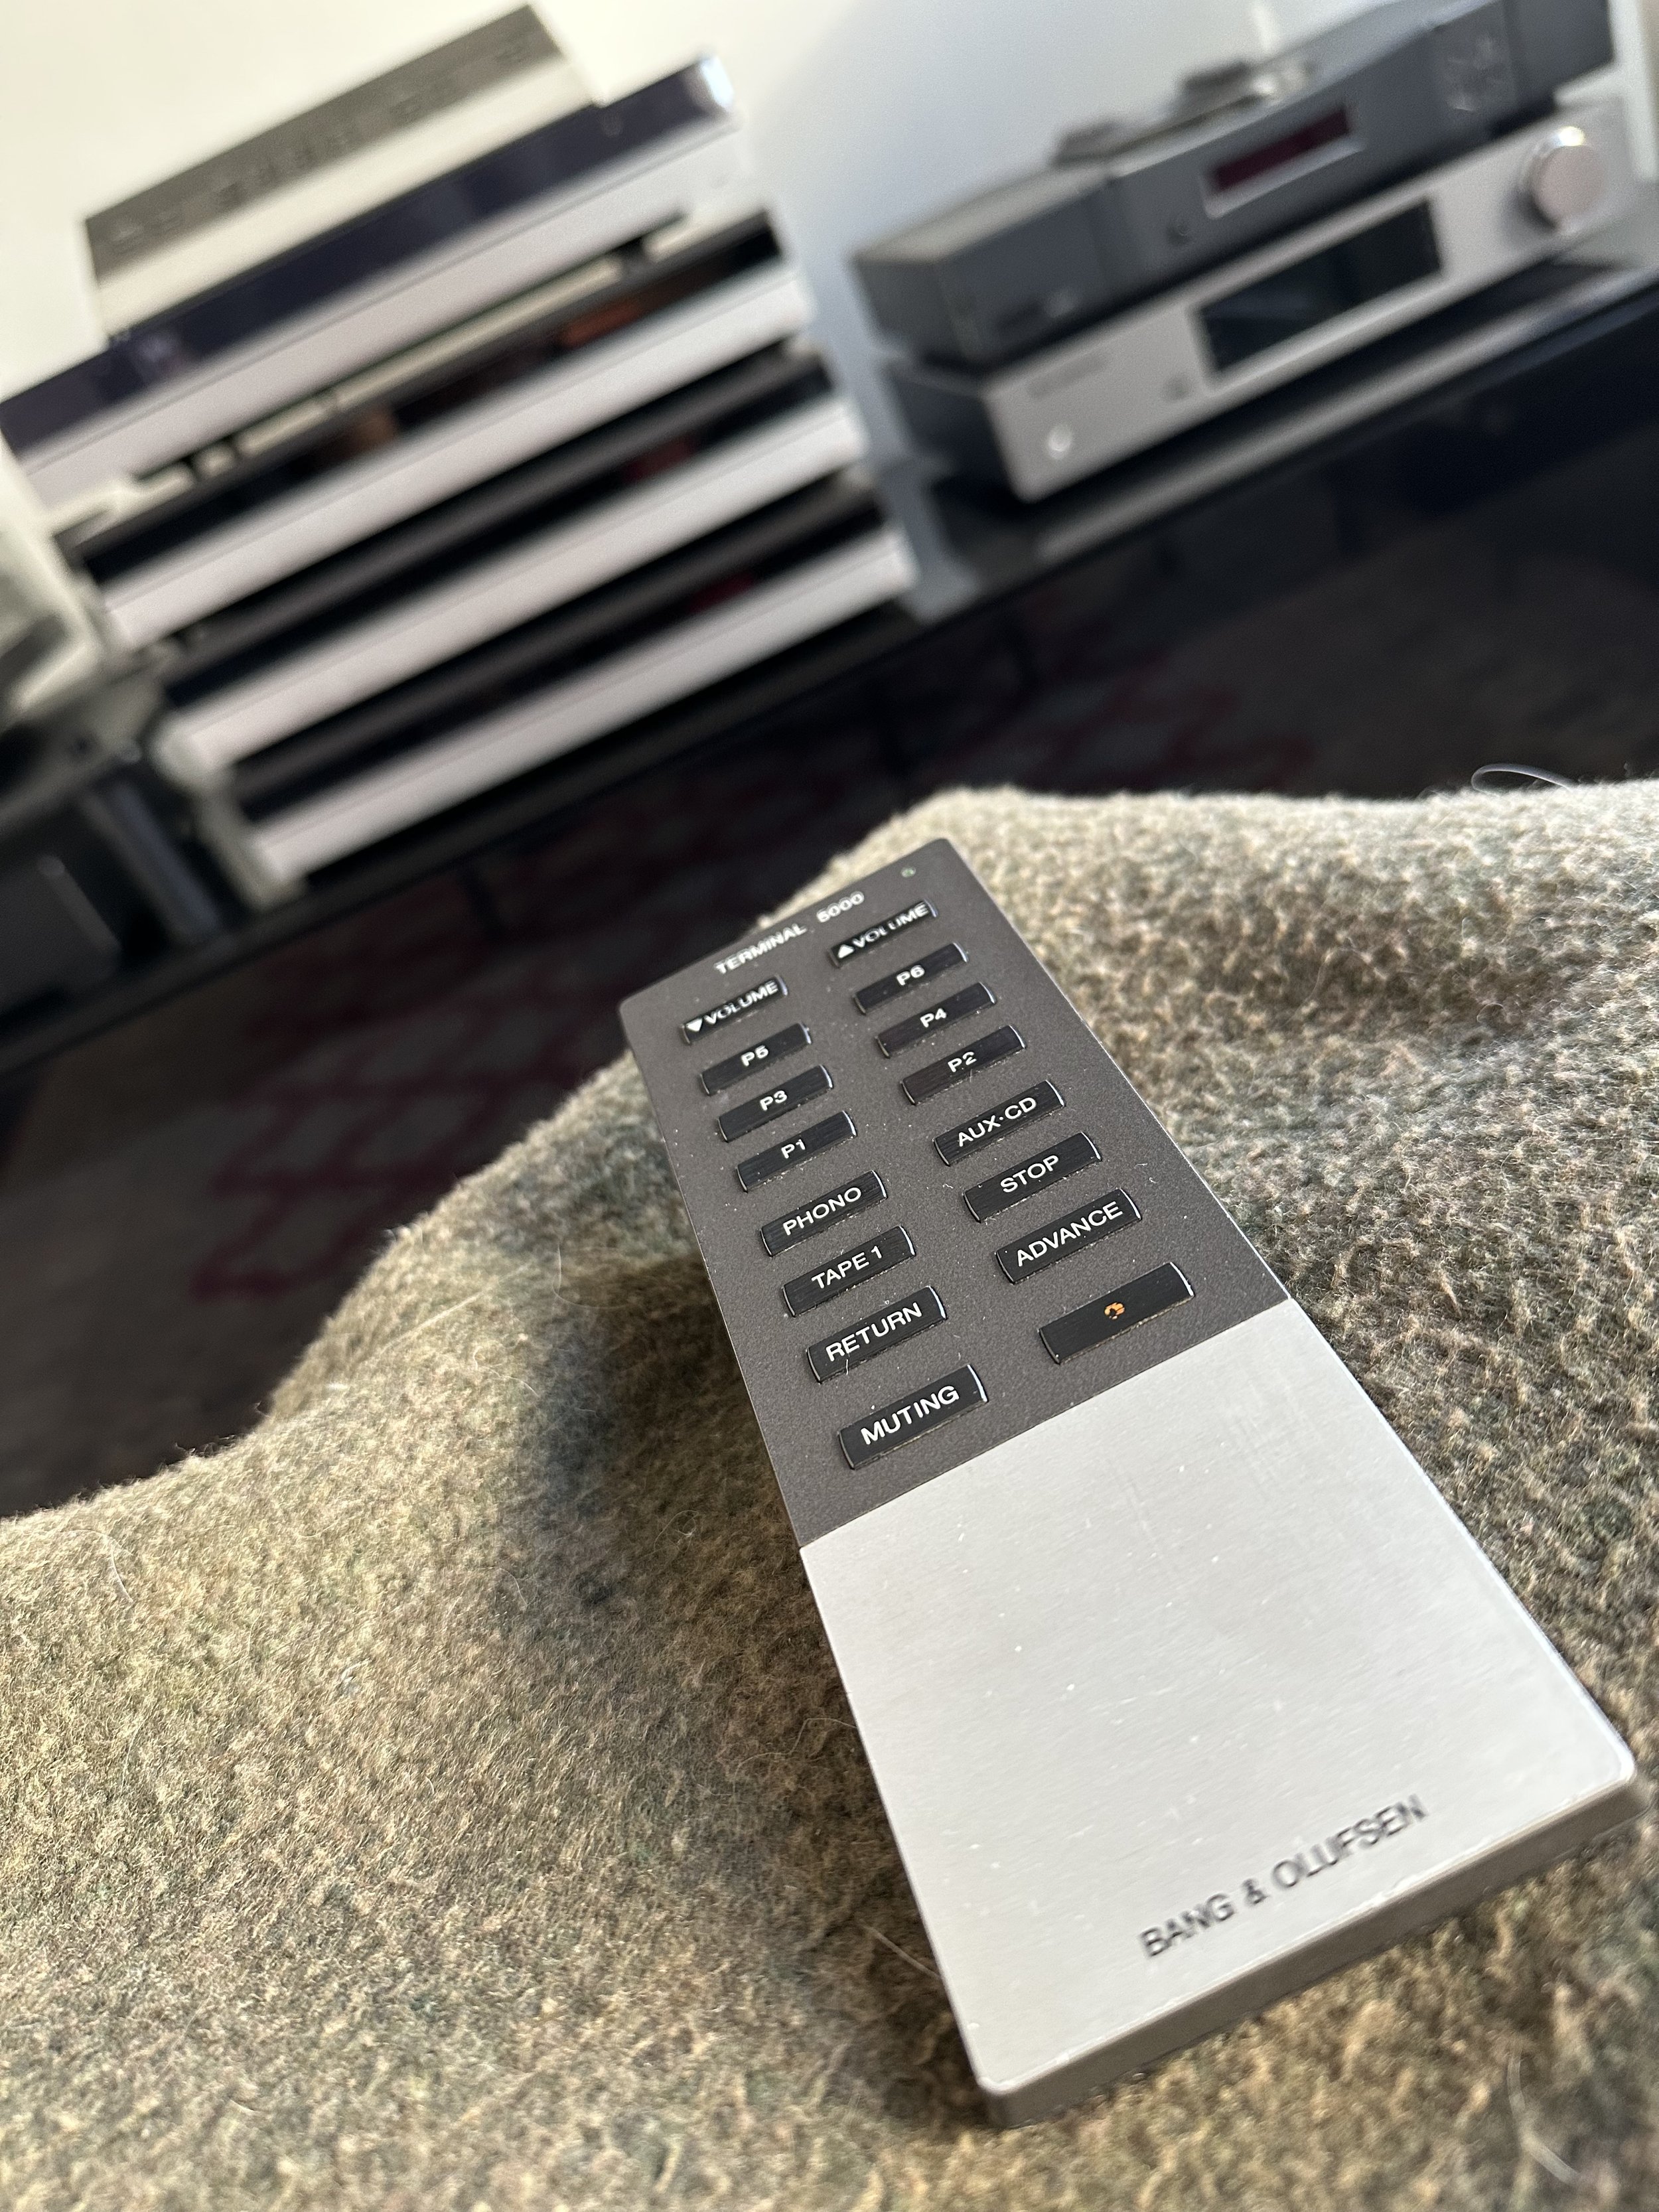
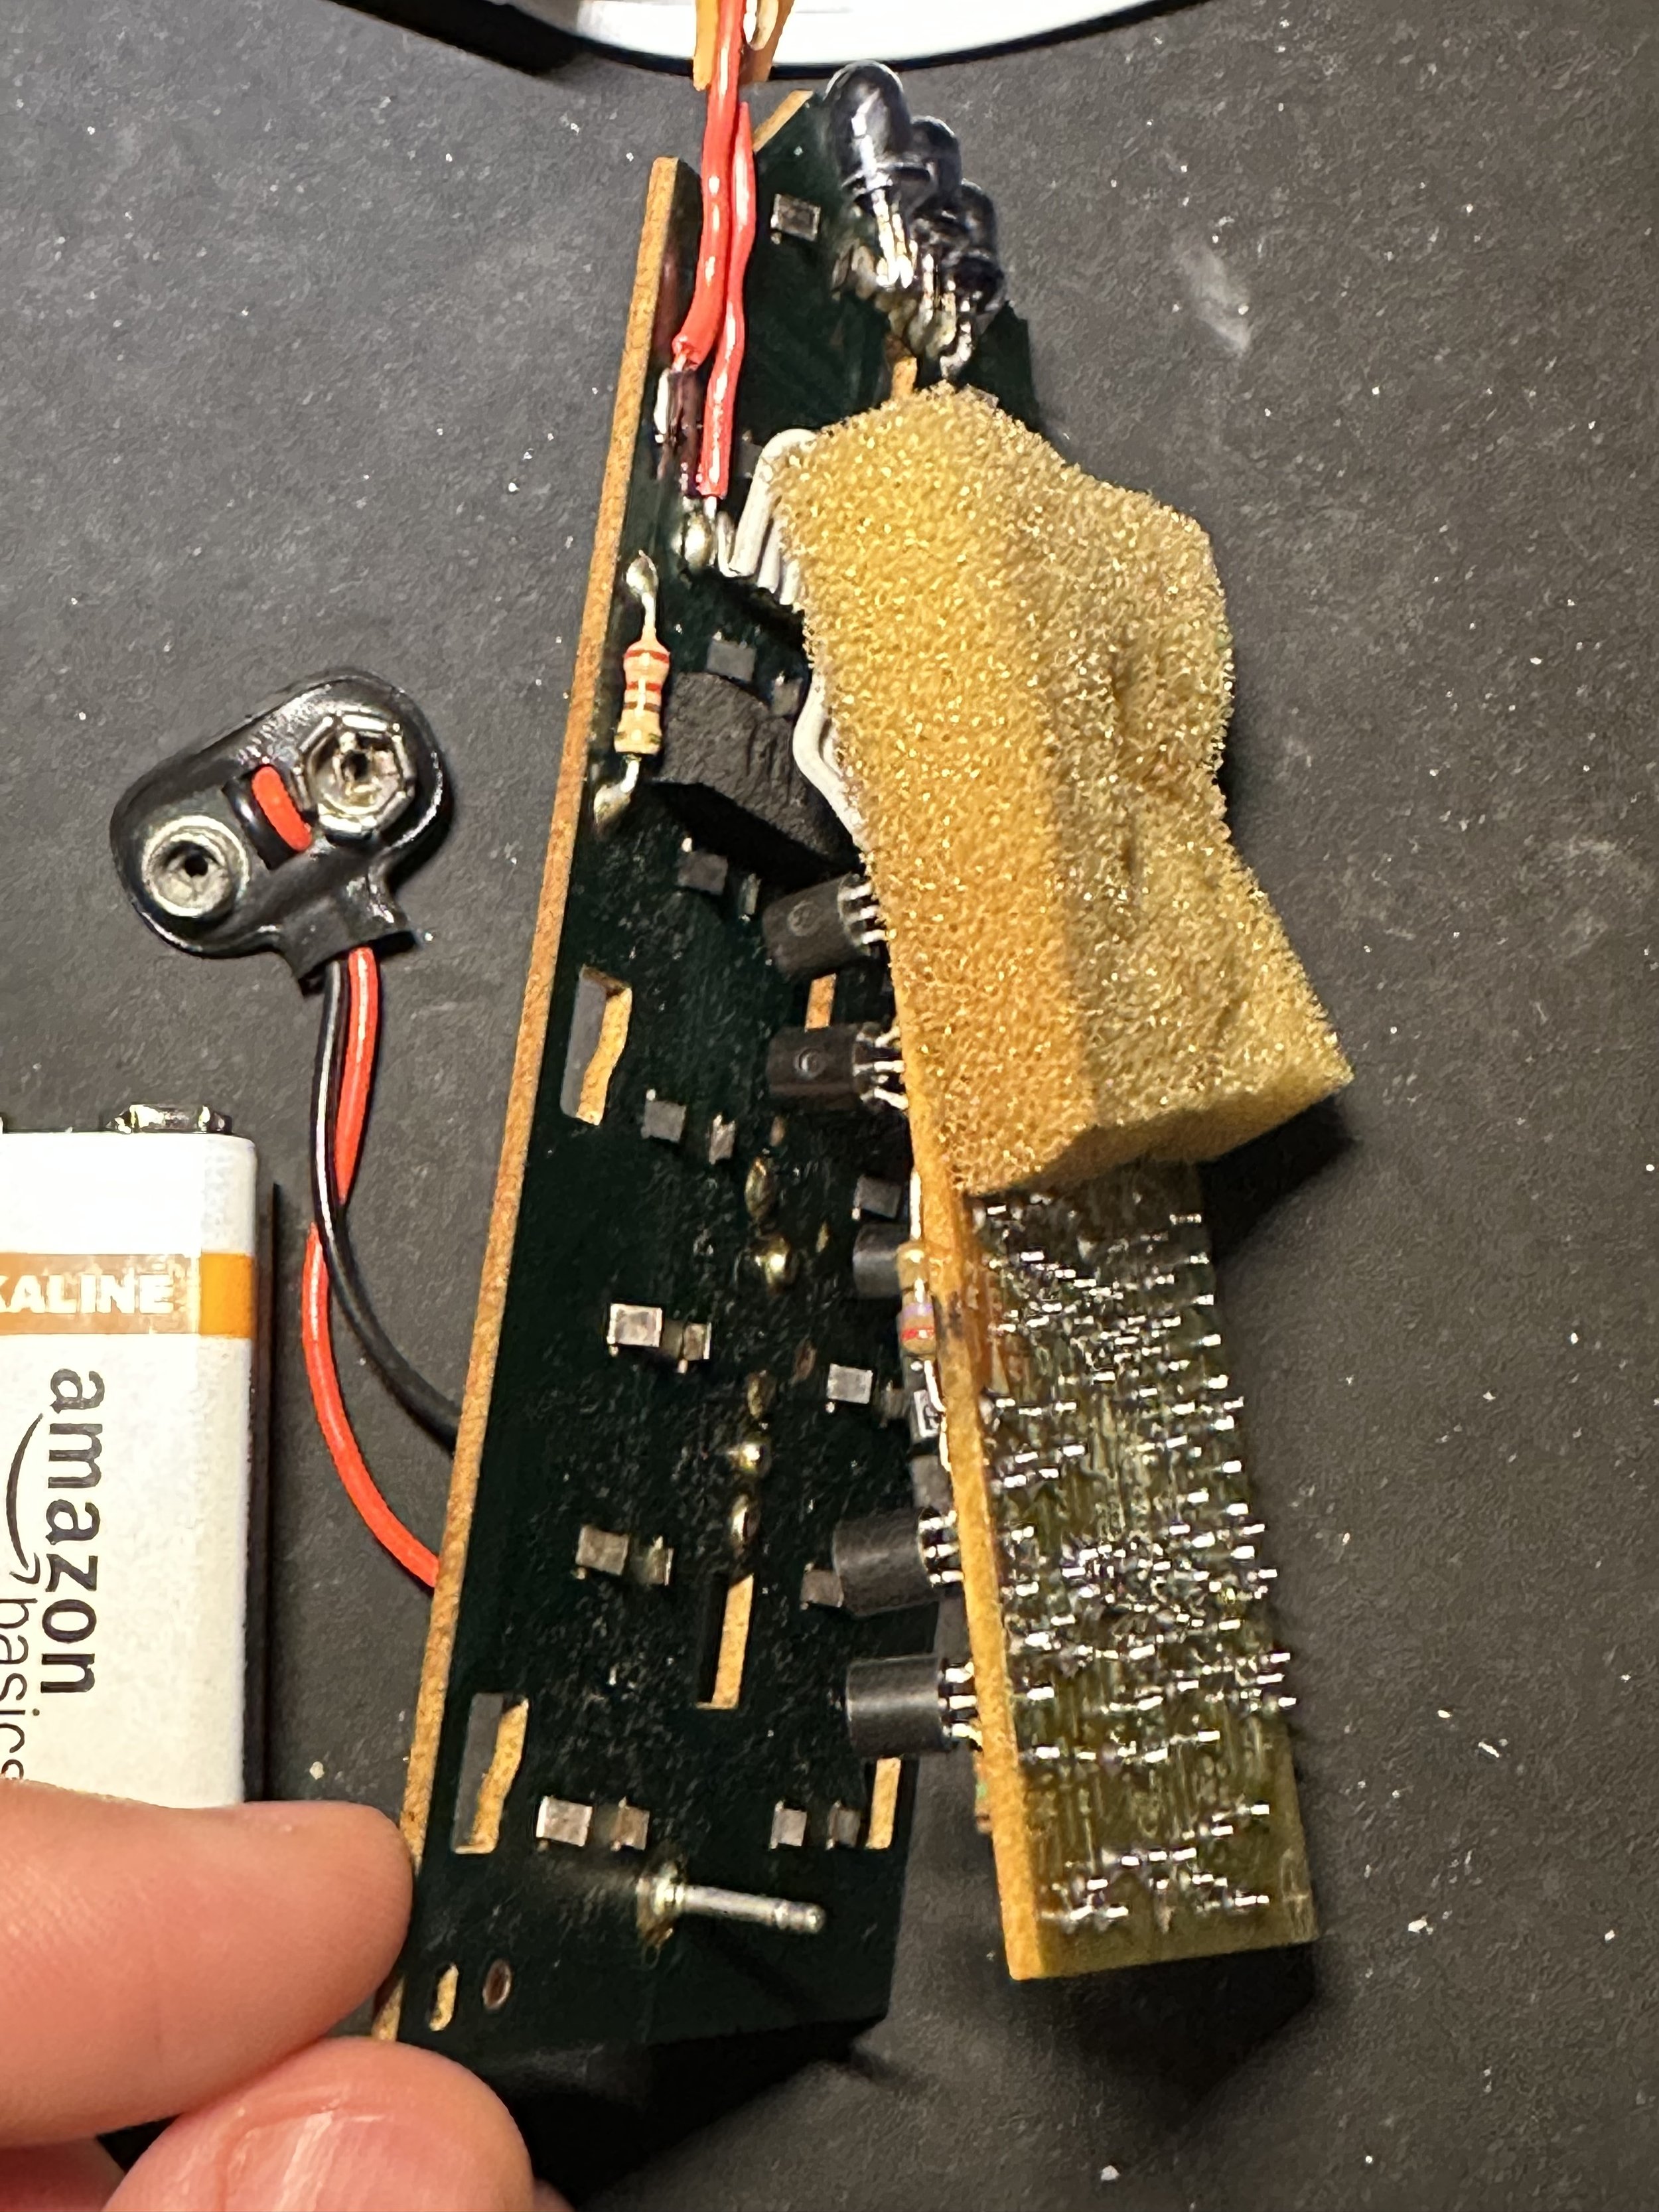
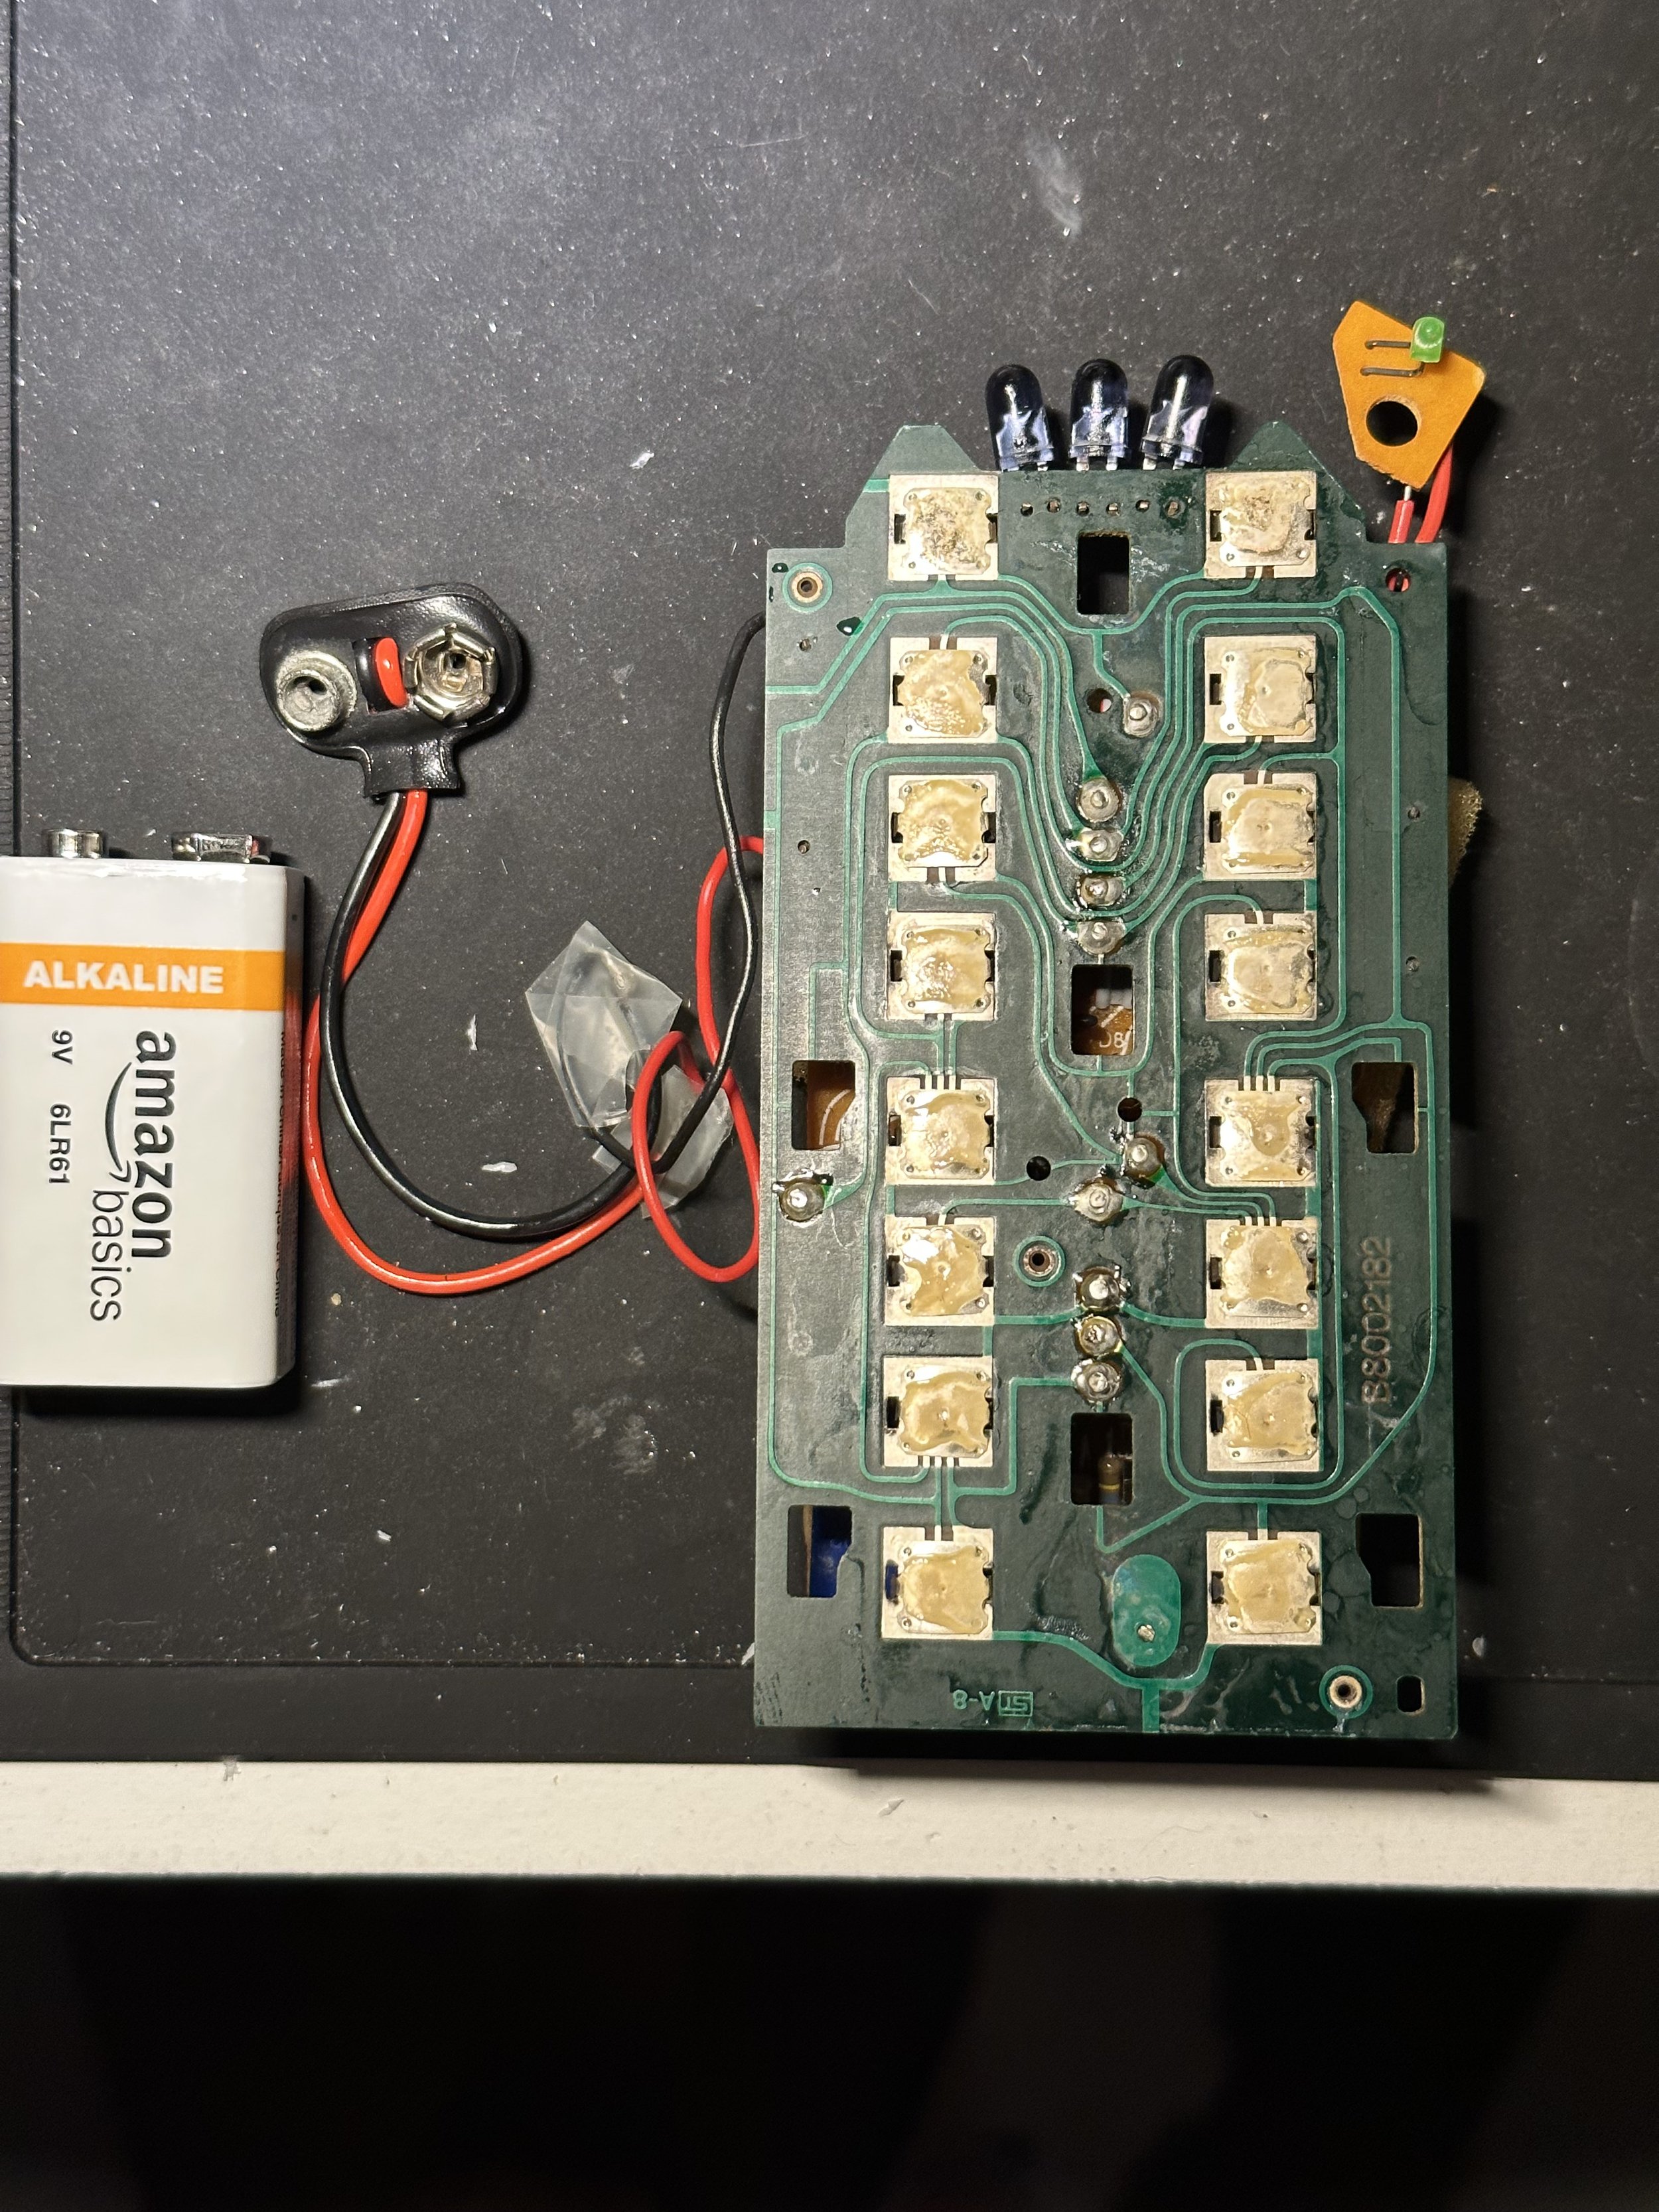
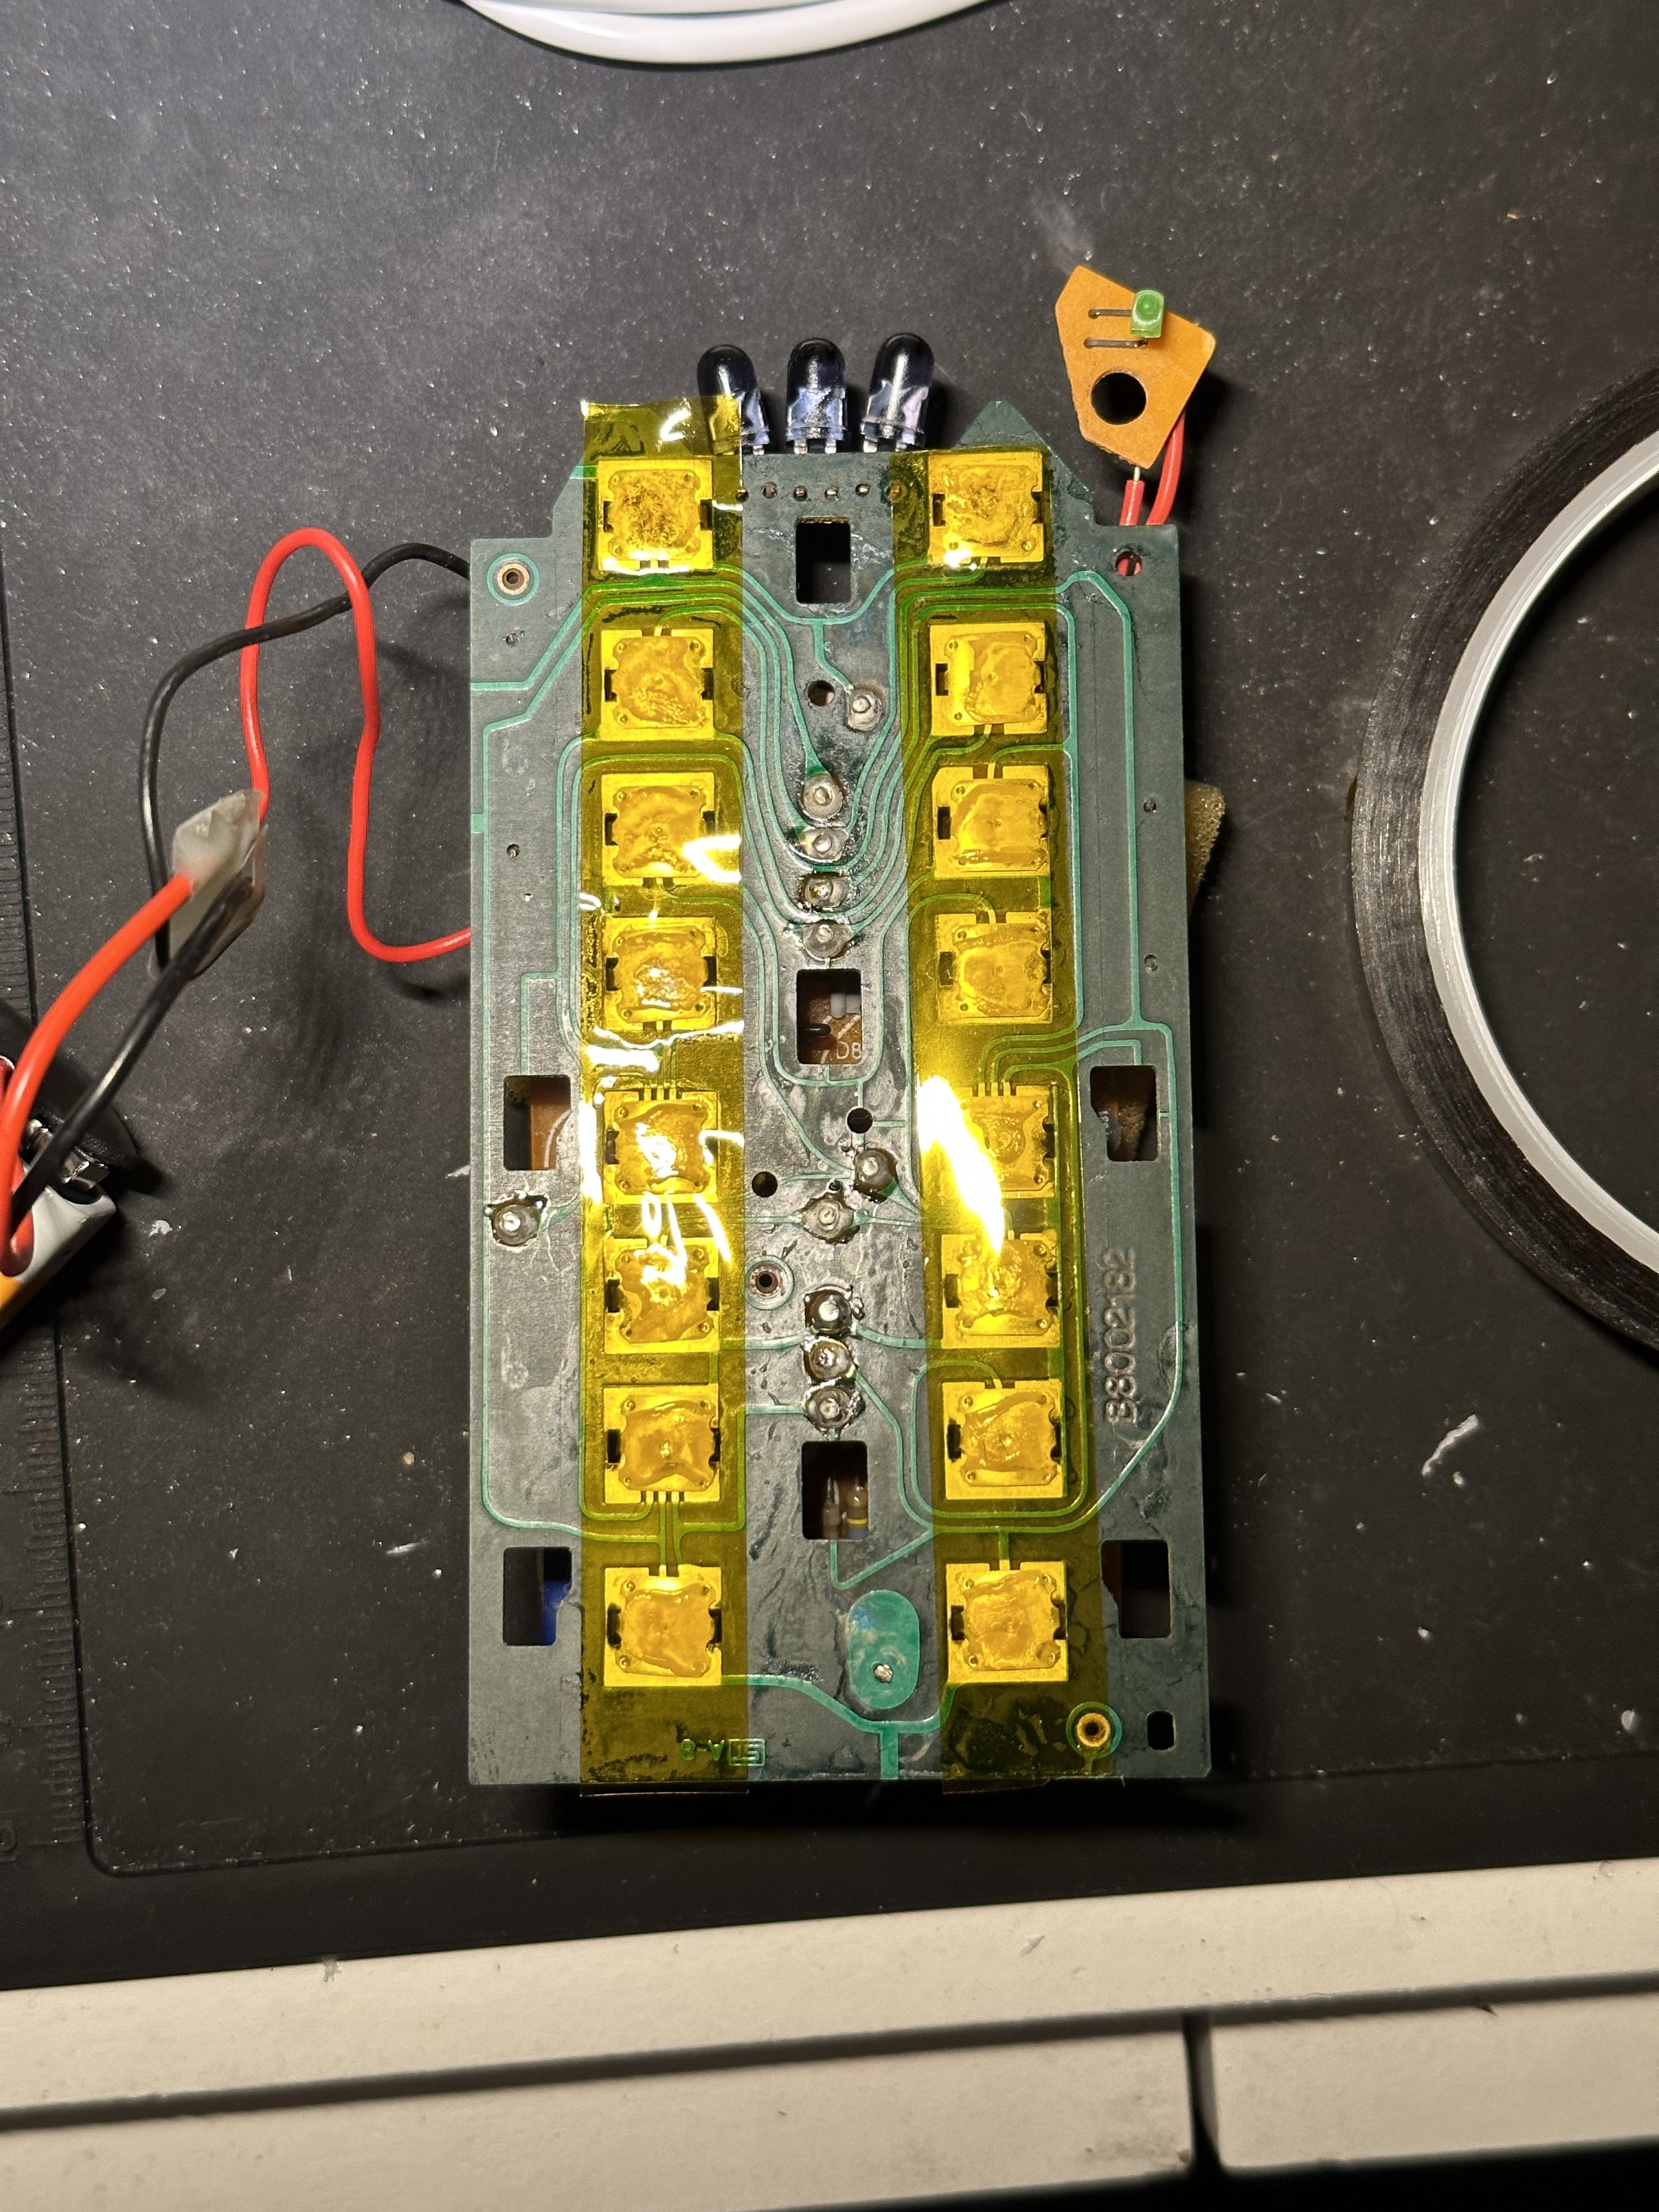
I wanted to get the matching ‘small’ remote for my system because as much as I like the large one, it takes up a lot of desk space. I finally found one on eBay in Poland, and it took a few weeks to actually arrive. When it did, half of the buttons didn’t work.
I disassembled the remote and cleaned all the contacts, then reattached them with kapton since the original insulator was ruined in the process. Many of the buttons still didn’t work, so I resoldered the joints and that did the trick.
I will probably replace the battery connector at some point because whoever repaired it last did a messy job, but for now it works.
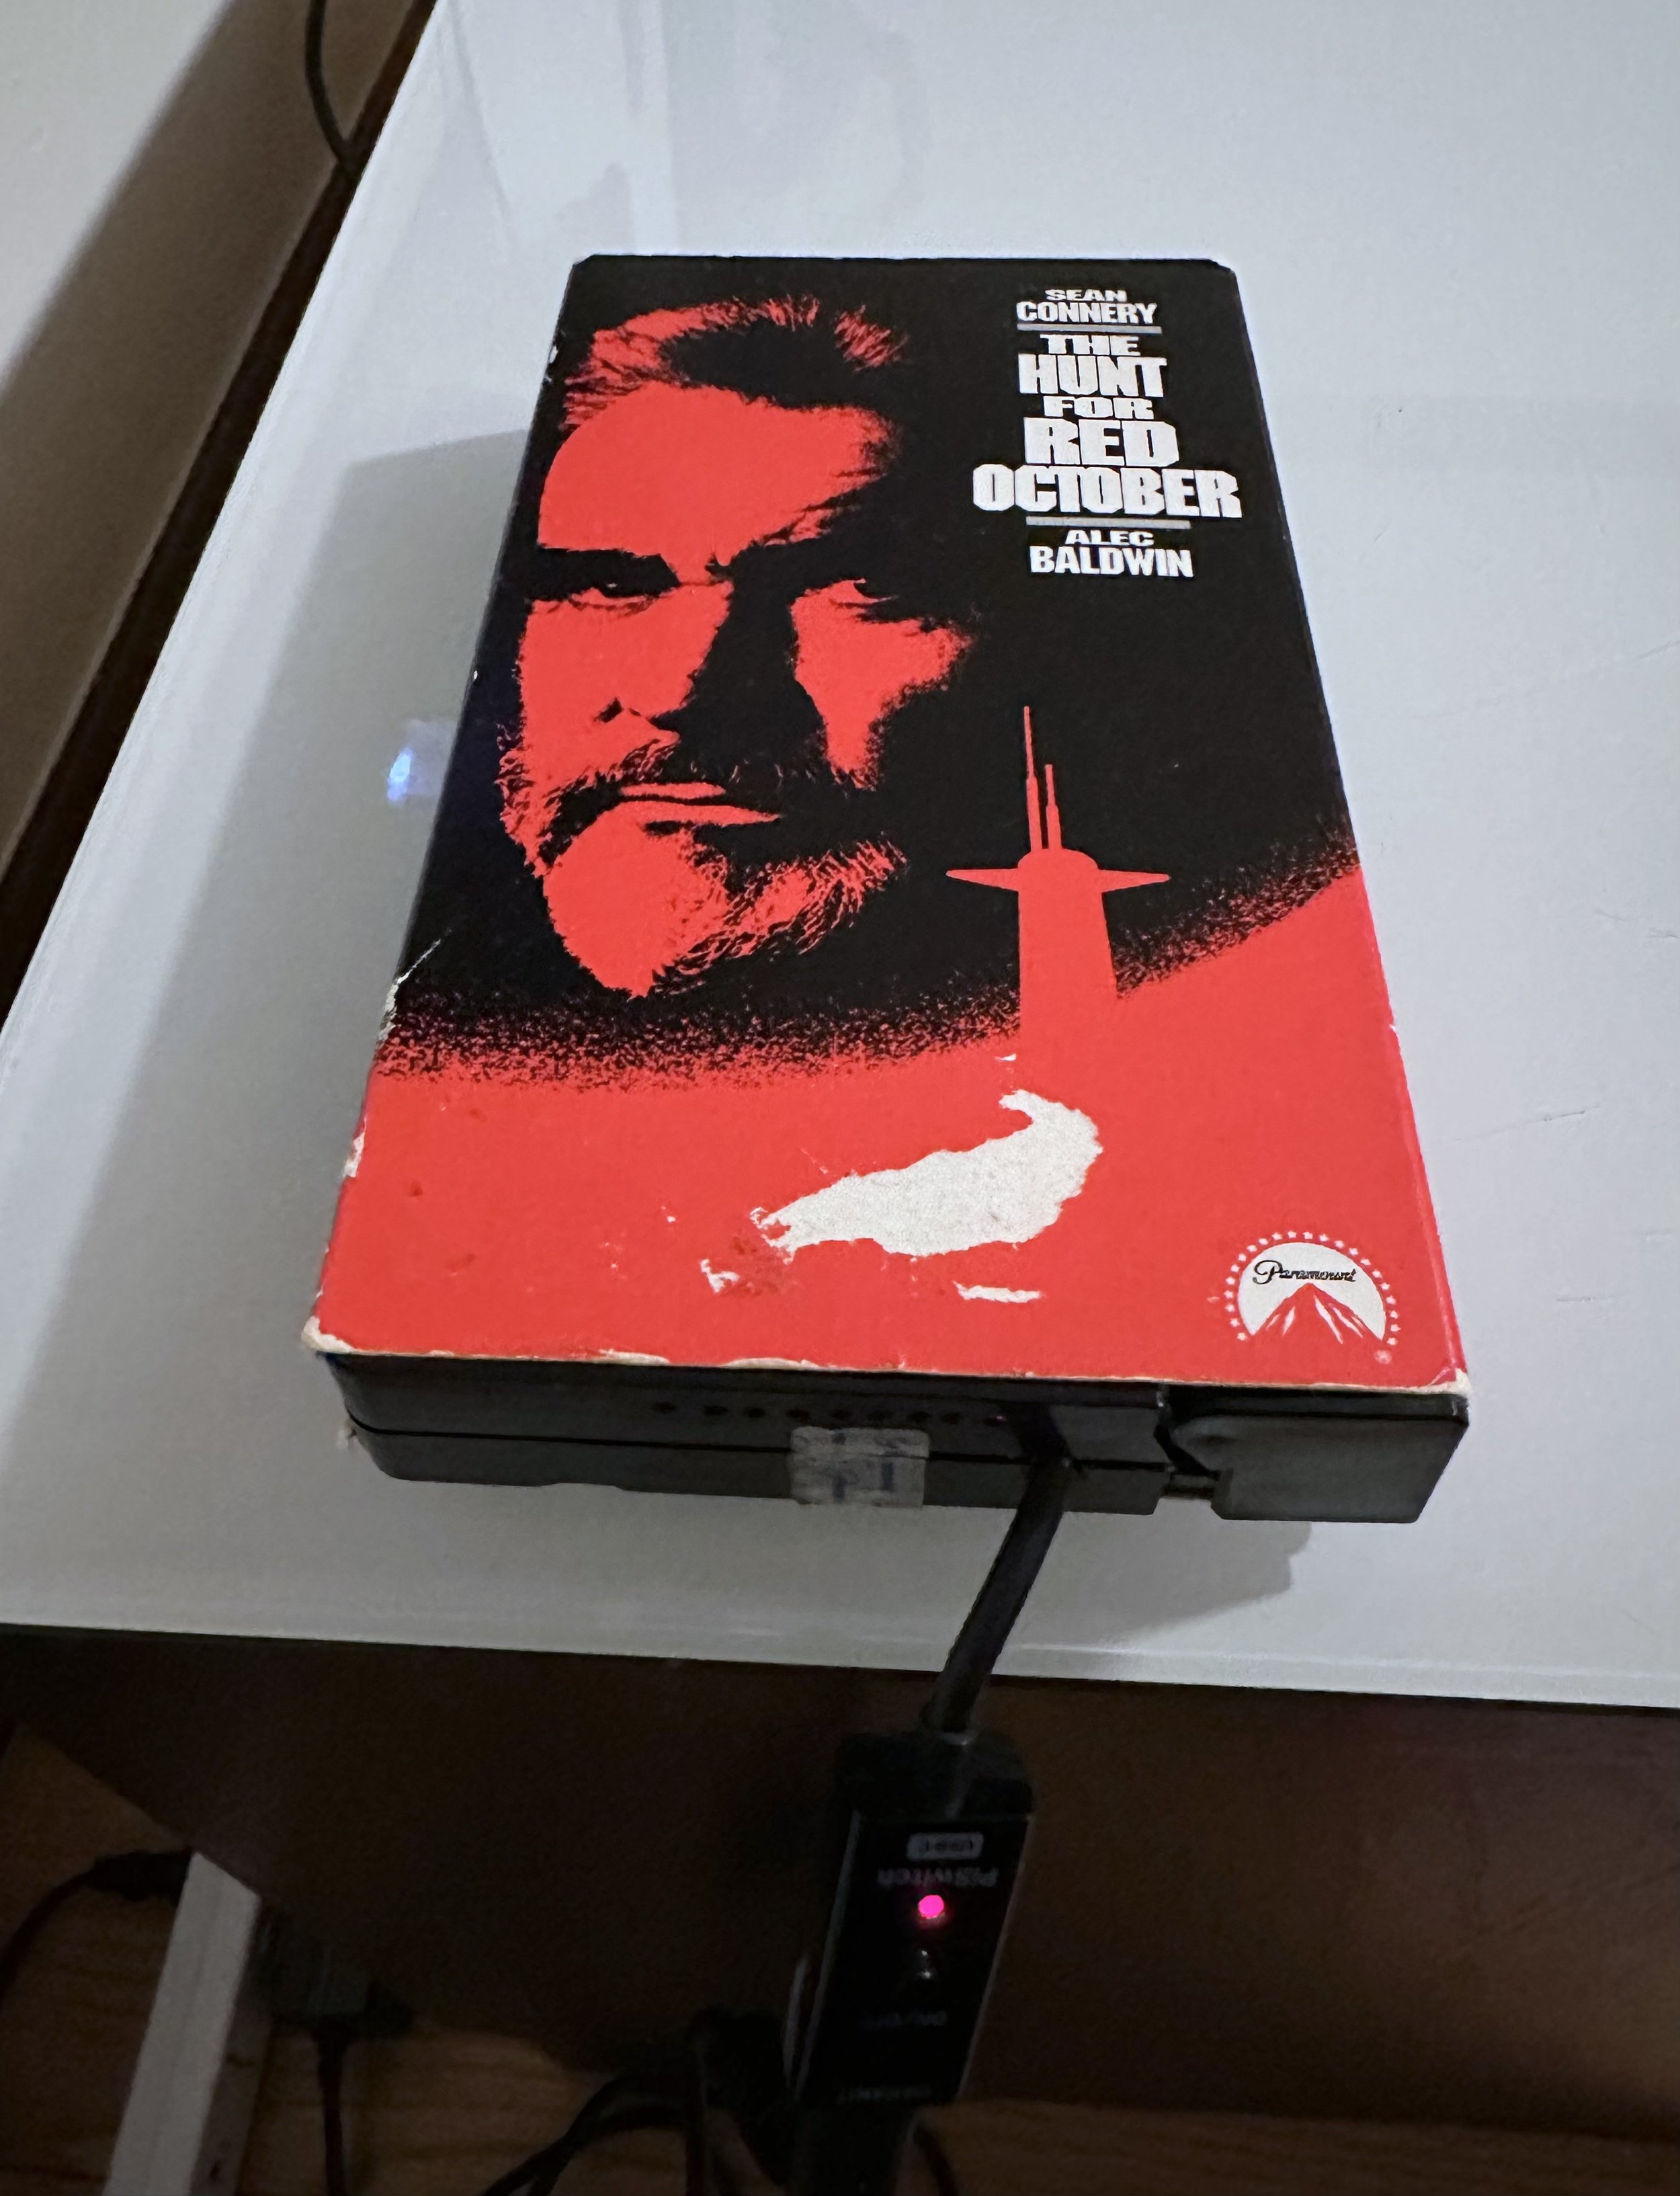
My brother and I have been talking a lot about the movies and TV shows of our youth, so in tribute to that for Christmas this year I made him a 1 terabyte movie server filled with some of the shows and movies that we watched as kids. Everything from Batman the Animated Series to Knight Rider was included, most of which was originally from my DVD collection.
To build the server I found a VHS copy of The Hunt for Red October for $1 on eBay. I had a Raspberry Pi and a small fan lying around, and removed the magnetic tape from the VHS cassette so that I could replace it with the Pi. I used one of the cassette reel holes as a vent in the bottom, and raised the unit with rubber feet to encourage air circulation. I added some small holes along the side for air intake too.
Once the enclosure was done I wrote an SD card with Raspbian OS and installed Emby. I knew he had two TVs that ran Roku TV and it would be easy to install Emby onto both of them. I dropped the files I had for him onto a 1 TB USB drive and attached it to the Pi, then used Emby over my network to be sure the catalog was accurate.
My final touch was that because I knew his WiFi password I pre-programmed the unit so that the whole server was turn-key. Once he plugged it into the wall anywhere in his home, the server would connect to his network and make the library instantly available. Setup took all of one minute installing Emby on his TV. His reaction was, “Wait, that’s it? How did you do that?”
I have been interested in the idea of a Smart Home ever since I was a kid watching Star Trek. Watching the way the Enterprise crew could gather and interact with data, and use the computer to control their environment was always inspiring to me. In 2009 I connected a Mac Mini to my TV and had it display the weather, news headlines, and pull the CTA data from their public API so I could time leaving for the train without standing in the snow. In 2013 I added features so that I could do everything from admit guests at the main door via a text message, to tracking movement, temperature, and other metrics. This was built using DIY parts on the OpenHAB platform, then Indigo Demo.
When I bought my new place in Old Town I decided to start over with more up-to-date components and greater flexibility. My core tenets for home automation had always been the same, though:
Open platform: This enables the ability to do a lot of custom configuration.
Stand alone: There are numerous examples of home automation companies going out of business and, in the process, bricking their components. With no updates and no cloud services, they were rendered useless. I wanted to be able to not only have a Smart Home that functioned if the internet went out, but also one that would not rely completely upon a service that could disappear tomorrow.
Effortless use: The smart home had to work without training. That is, it had to be apparent at face value how to interact with it. A guest should be able to turn the lights on.
Privacy: I wanted to manage and own any data that I generated, without having to share it.
I considered a lot of platforms. Google Home and Amazon’s suite of products were immediately ruled out for three of the four criteria listed above. OpenHAB was a contender, but when I used it back in 2013-2017 it required a lot of editing config files and writing code. Support was significantly better than it had been when I used it, but there were still a lot of components I wanted that were not currently supported. I also considered Indigo Domo but the price had gone up significantly, and there were other alternatives with larger support communities.
I eventually settled on Home Assistant because of the ease of use, the support, the community of passionate users, and the constant updates that are making it easier to use every month. Additionally, if I wanted to use a “Big Three” platform, there is a bridge to Apple HomeKit, which is both reliable and values privacy more than Google and Amazon.
My current Home Assistant setup:
I was able to install Home Assistant on a Raspberry Pi, but I made sure to boot it off of an M.2 SSD rather than the standard micro SD card reader in the pi. SD cards have a tendency to fail after many writes, and the log files in home automation platforms can wear SD cards out in a matter of months.
The other standard I wanted to use was Z-Wave. This RF standard creates a mesh network for all of the connected devices. Z-Wave is better than Wi-Fi for home automation devices in many ways: it requires less configuration, it has better range, it has less interference, it is as secure, needs less power, and the mesh network means that the network is stronger with more devices. Additionally, you can easily change your Wi-Fi password without breaking your system. Bluetooth devices have much worse range than any other standard, and their reliability is questionable because they weren’t designed specifically for home automation.
Another common standard right now is Zigbee, but Z-Wave has a more rigorous implementation standard, and is generally accepted as more reliable and possibly more secure than Zigbee.
Incidentally, I am very excited to learn more about the Matter standard, which is promised to be the future of home automation. Little has been released but I am going to continue watching for details.
But it is rare to use only one standard. There are inevitably devices that require Wi-Fi, as well as their own custom service to interface with the platform. Again, this is where the support community comes in. I wanted to connect my Beosound Stage but there was not an official service to interface with it. Luckily, someone with no coding background wrote one in an afternoon.
The install was relatively straightforward. I made sure to research the most compatible components prior to purchasing anything. For example, I learned that Nest thermostats do not have an open standard and the API compatibility changes with each update, so I got an Ecobee instead because their API is more compatible and reliable. The most complex installation was for some of the light switches, which needed expanding to 3-gang boxes anyway, so I had an excuse to attack the wall with a saw. The easiest install was for the Hue bulbs. I had a number of them already and there was no need to replace them since Hue could be integrated into Home Assistant.
The only elements that required a professional installation, surprisingly, were the automatic shades in the bedroom. Window treatments are always expensive, but they come with free measurement and installation because it is too difficult to do returns on made-to measure goods. Graber makes Z-Wave shades, so I was really excited to find a fully compatible option rather than one that requires wifi or its own hub.
Some installation progress pictures:
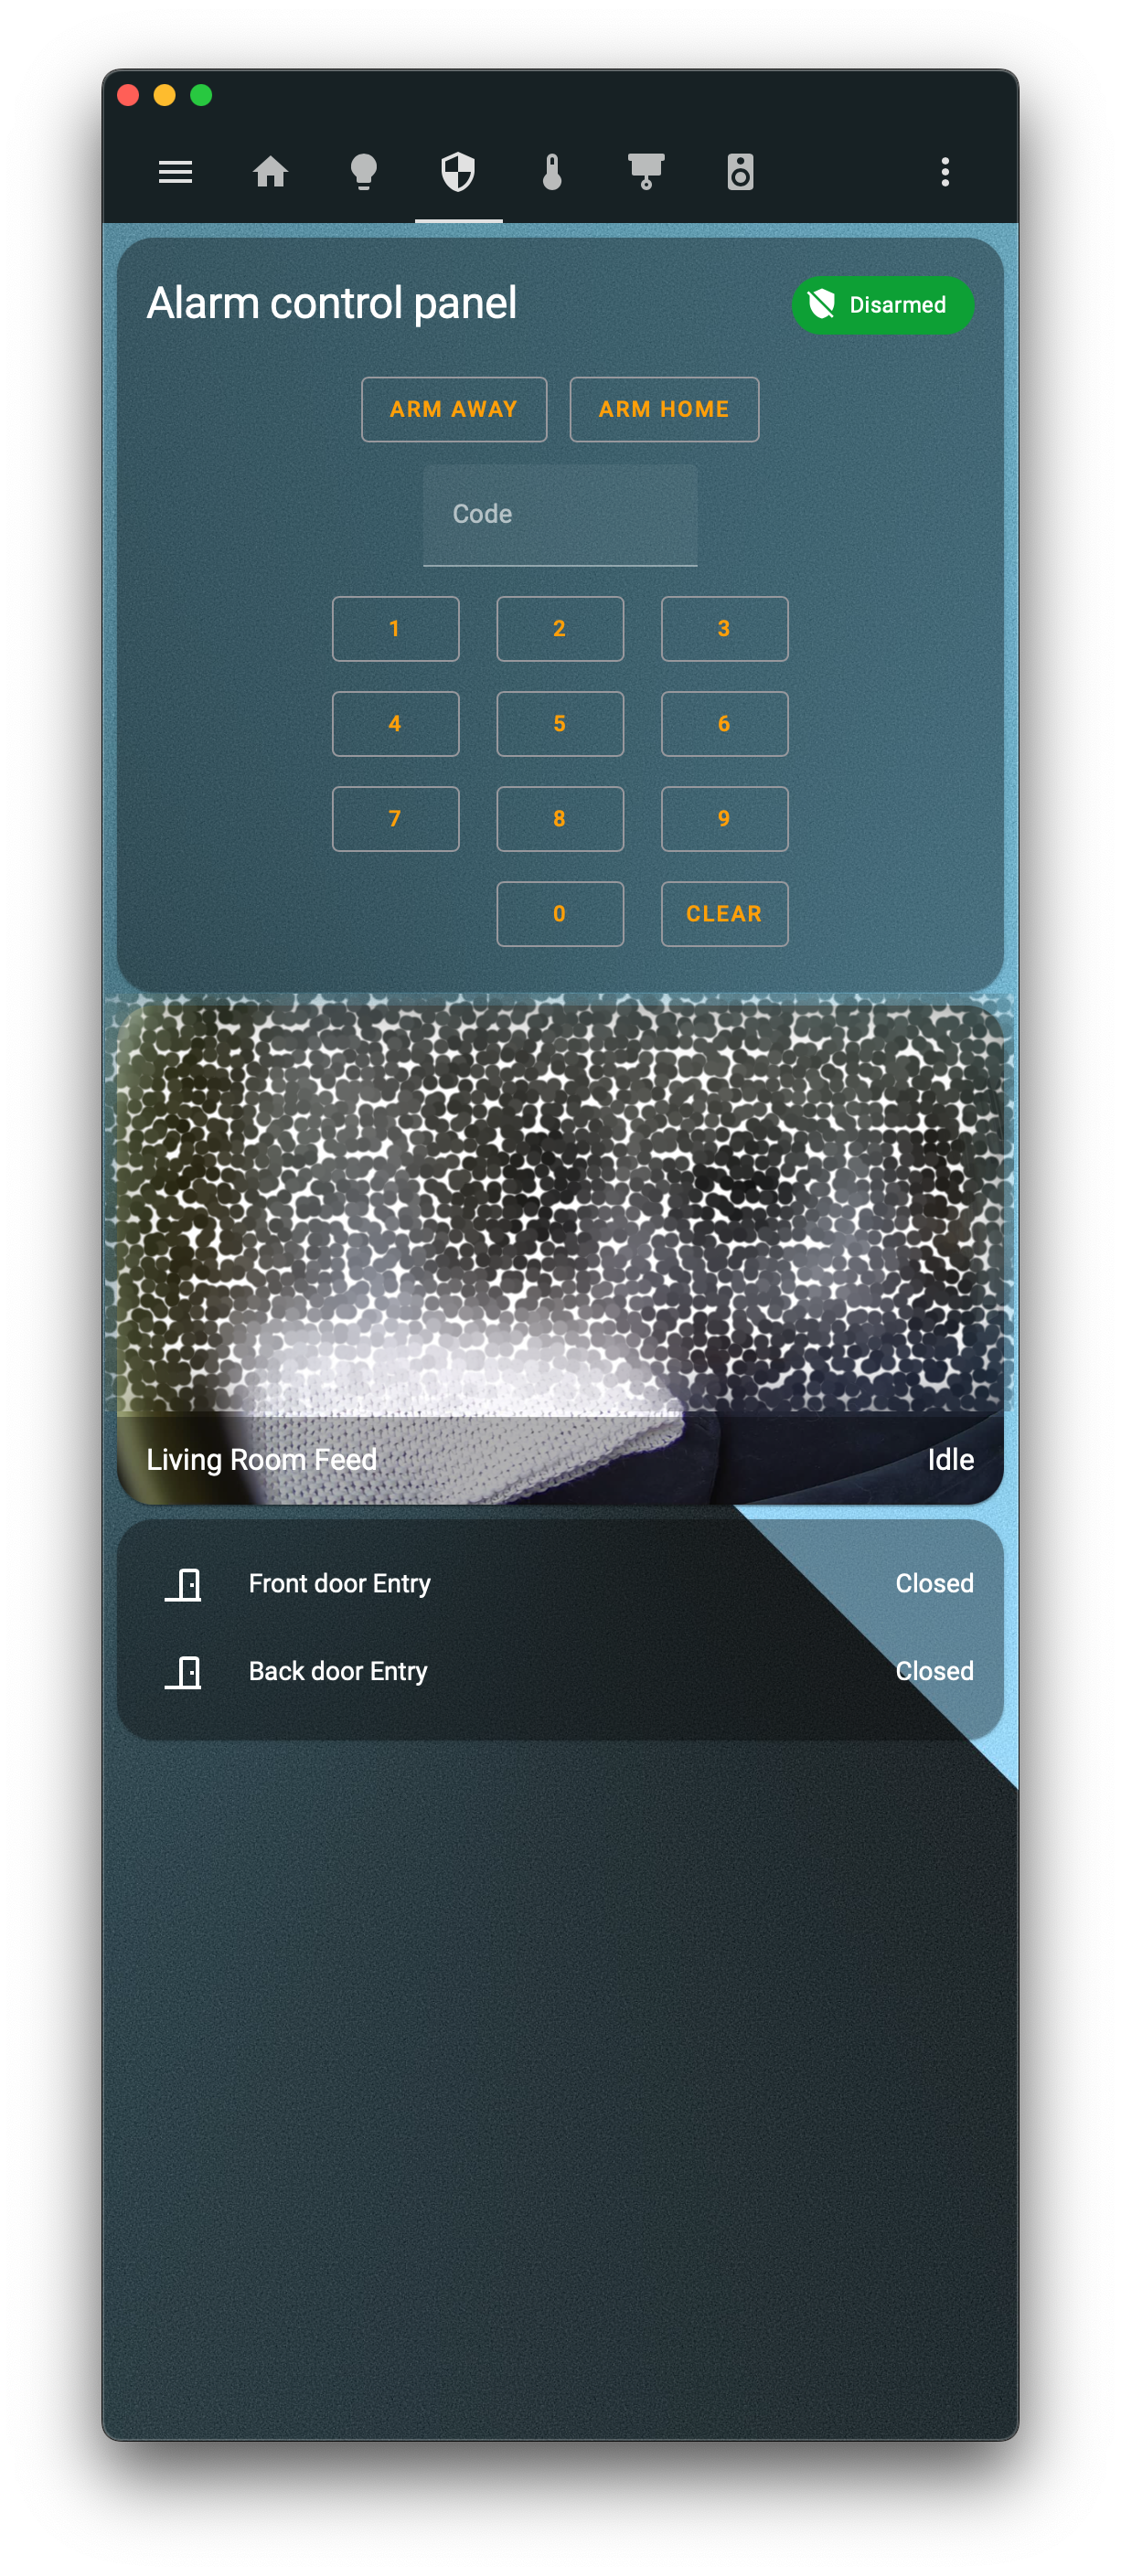
This version of my smart home is currently able to integrate calendars, weather, public transit data, temperature and humidity inside and out, lights, SimpliSafe security, the thermostat, our bedroom shades, TVs, the BeoSound Stage sounder, my Cambridge DAC. These are some of the actions that this platform has enabled me to do:
Schedule the blinds to open at a set time in the morning and wake us up
Scan an NFC tag on the nightstand that turns off the TV, all the lights except for one nightlight, and arm the security system
Control the music that is playing all over the house
View a shared calendar, along with weather
Have the lights turn on when at sunset, or close the blinds at midday to conserve energy
Turn on LED lights in the kitchen when the overhead switch is also turned on (there are two separate switches on either side of the kitchen and it doesn’t make sense to me to separate them)
Track the CTA busses and alert me when one is a few minutes away
Get alerts when the printer is running low on ink
Reset the cable modem remotely without having to dig for the outlet
Some things I learned along my smart home journey:
Smart homes are built on connecting, then coordinating, then predicting. If you are adding a component to your house, look for a way to connect it to the home automation system. Once connected, it will allow you to coordinate other components with it (change a light to green when your washer is done, for example). Once you have it connected, you can also gather data on usage, which ultimately allows you insight into your own behavior and can enable the smart home to predict your behavior.
The perfect example of a smart home fail is this: You have a smart bulb that you turn on with your app, and someone switches the light off which prevents you from being able to turn it on again with your app. This problem has a lot of implications, the biggest is that smart homes require technical knowhow in order to implement solutions that aren't bodged together.
MY next priority is implementing some kind of power monitoring. This will enable me to connect presence/motion with power consumption, so that I can turn devices off when I know they are not in use. I also want to implement notifications for appliances like the washer and dryer, and possibly find a place to dock a robot vacuum.
Building a smart home is always a work in progress, and these are just some reflections on the journey so far. When I do make updates, I’ll be sure to write about it here.
Trying to stay busy while at home during COVID, I bought a broken Beomaster 5000 and the accompanying system. Most of it didn’t power on, the belts and mechanics were all broken, and any rubber parts had degraded. Thanks to Beoworld I was able to locate both service manuals and replacement belts. I had fun diagnosing and fixing it, and eventually added the Beogram 5500 as well. Some things I learned:
There is a major difference when servicing devices that have been designed for repairability. I have previously repaired many MacBooks and iPods as well as other stereo components, and there is a big sigh of relief when a device opens easily and includes a service manual with replacement part specs, test points, and describes how to reassemble the device.
The CD-50 was a fascinating component, as it was the first CD player that B&O had ever made. Because it was so new, there were many last minute revisions to the device, including daughter boards and components that were not included in the finalized circuit board. Because of this it was much more sensitive to RF interference.
Capacitors fail, but so do resistors. And relays. And belts. Lots of belts. Belts fail when they turn to goo with age, and they take a lot of time and isopropyl alcohol to clean up before they can be replaced.
Don’t buy components from Florida (or from any humid climate). One of the amplifiers I purchased was from Florida, as was an NAD receiver I previously restored. Both had major damage on the inside due to condensation. I had to buy a second used Beomaster because there were so many damaged and corroded parts in the first one that I could not salvage much of it.
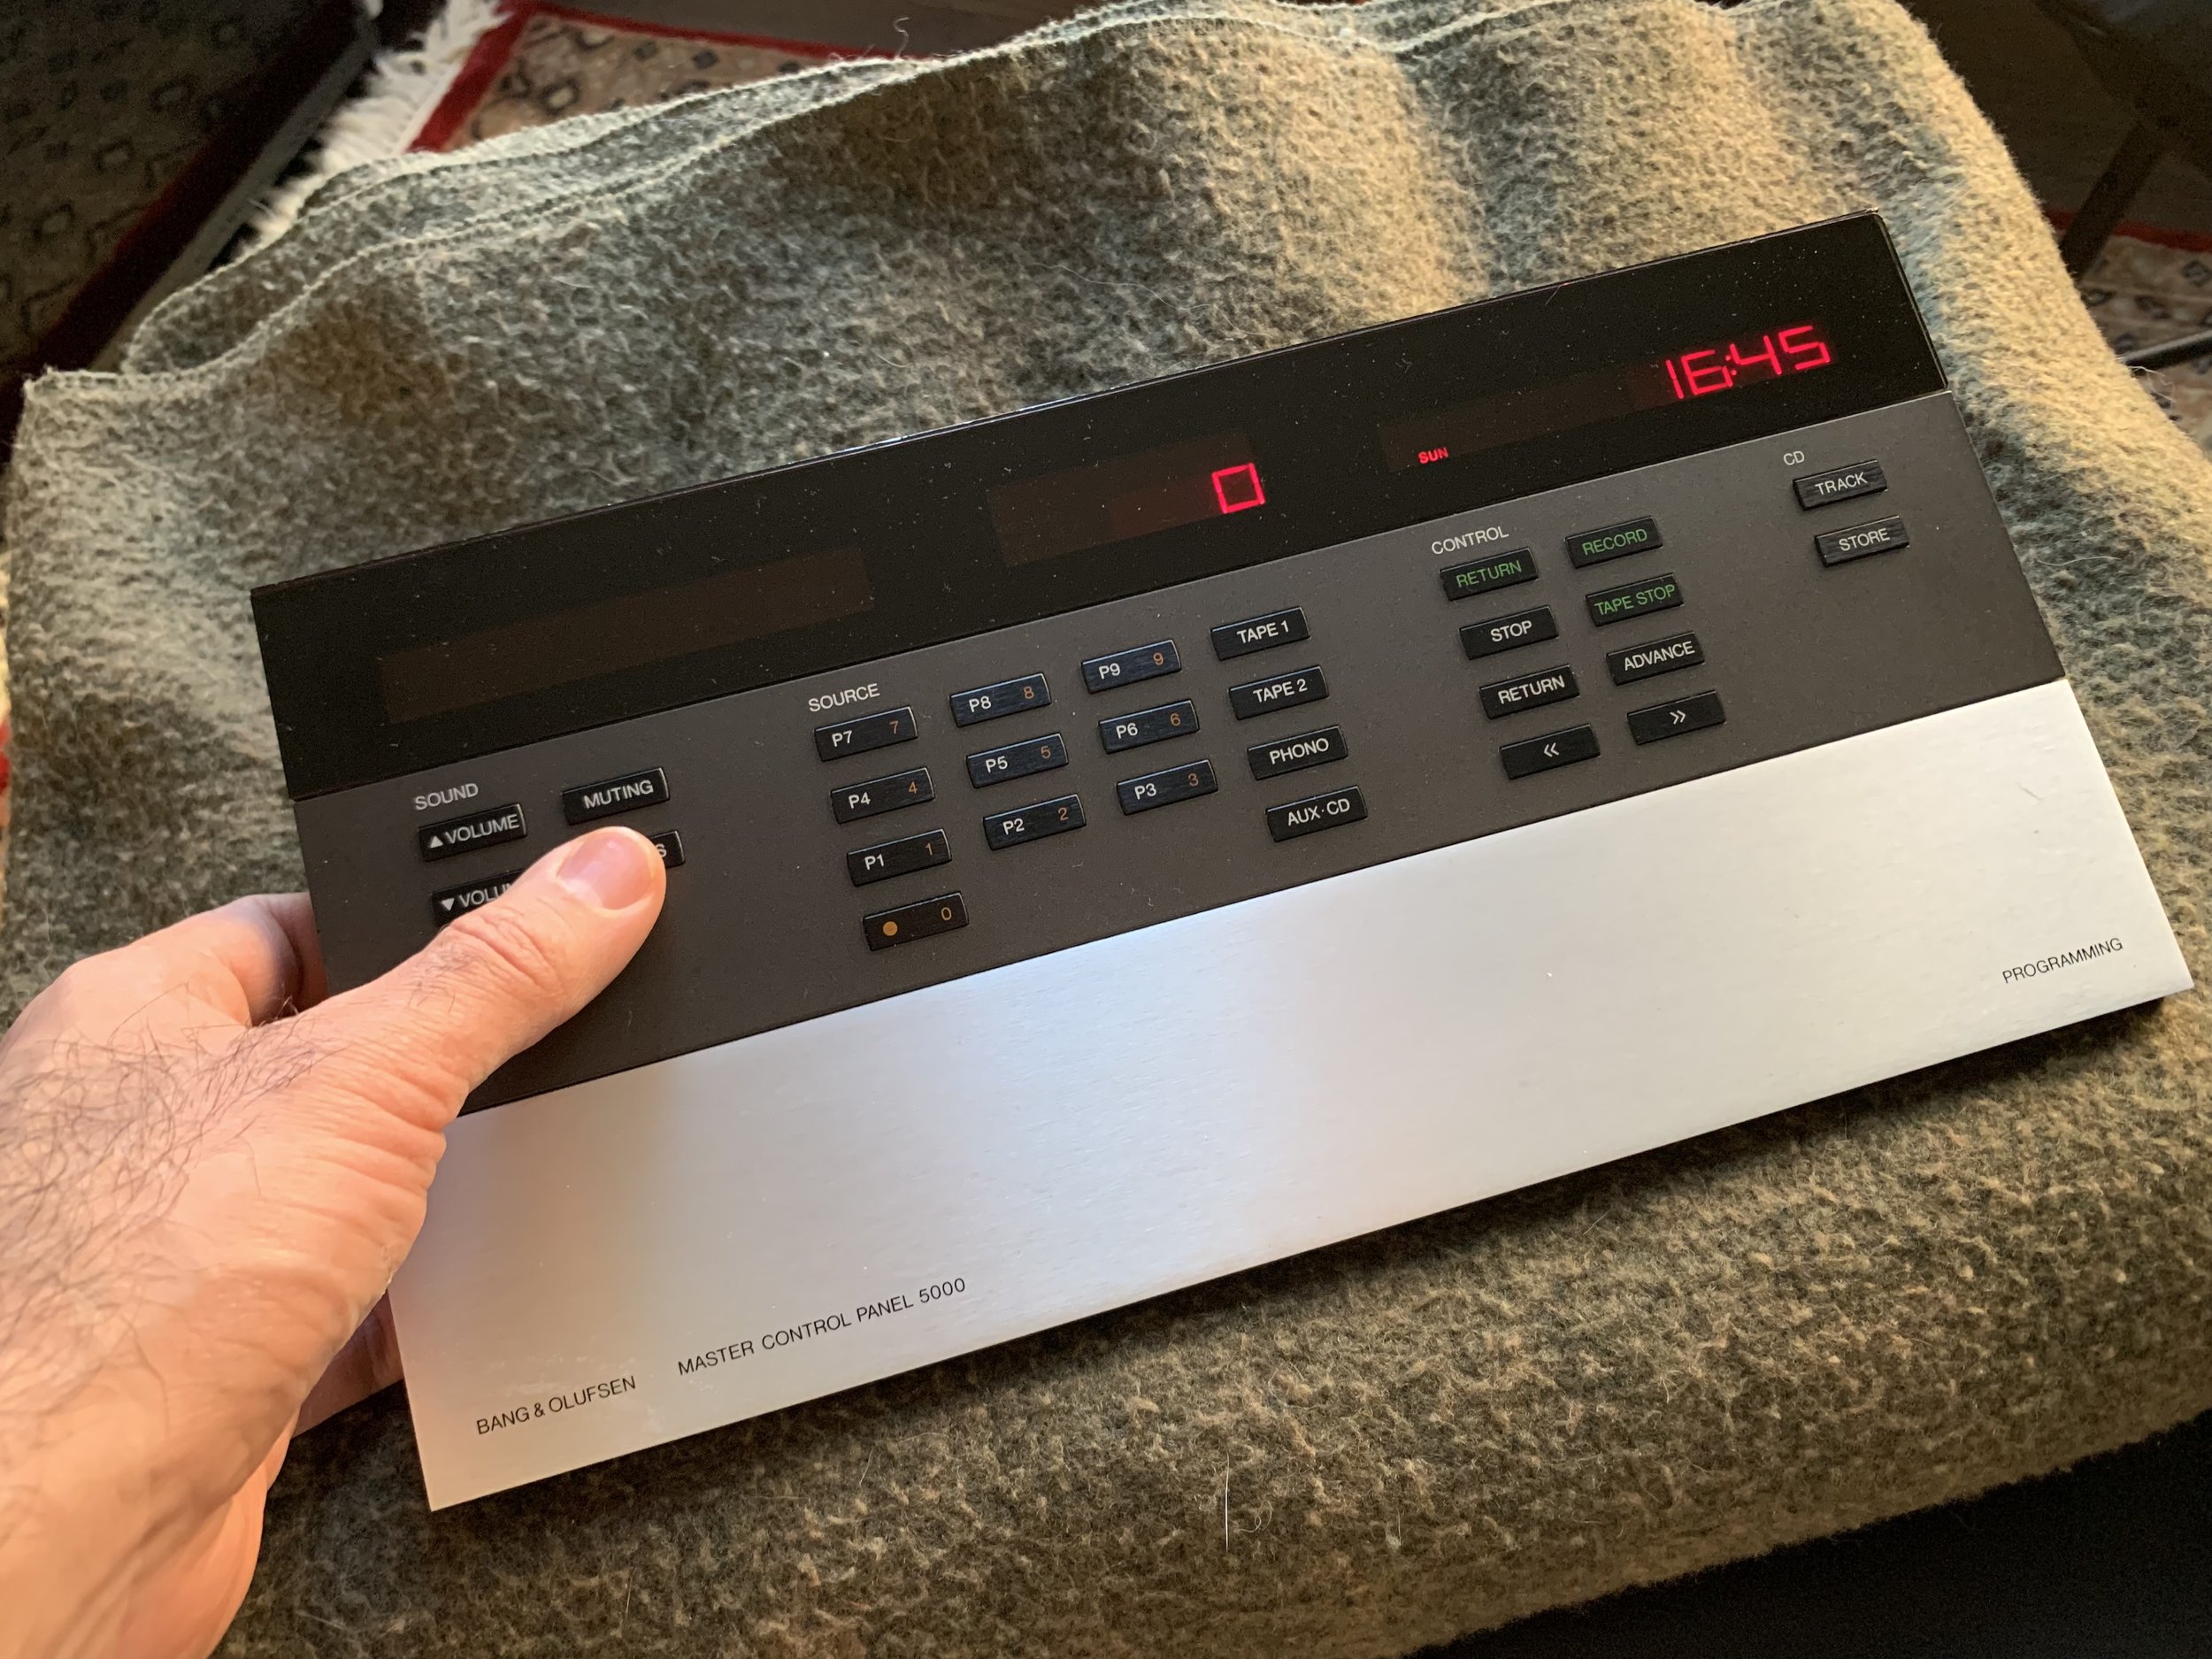
The remote for the Beomaster 5000 is a thing of beauty. It is made to perform every function on the system, and has a display that shows the status, time, volume, balance, mode, and other functions. Because of this, the remote and the receiver need two-way communication. This is the earliest I have ever seen two-way comms over IR (the system was designed in the early 1980’s).
The user experience is also very clear and effortless. All of the components are connected via a DIN connector that sends both audio and data back and forth, so if you press play on the phonograph it will power on the amplifier and begin playing. One button press. The same is true for the CD player and cassette player. Because it is so intuitive and effortless it still feels very modern and up-to-date.
When I was in Tokyo I visited a toy store with little wood and paper model kits, and picked one up for a little over $10. With too much time at home due to COVID, I decided to finally build it. It involved Google translate, staining wooden dowels the size of matchsticks, and a lot of careful cutting…
I think my favorite part was that I couldn’t find the bench pieces anywhere, only to discover the bench is supposed to be made from a pair of disposable chopsticks.
A community has appeared in recent years that restores old iPods and modifies them to work using flash storage rather than the original hard drives. Combined with new batteries, they address the two most likely points of failure to ensure the devices continue to function for years to come. Since everyone is stuck at home right now, I decided it was a good time to buy a used iPod and rebuild it to better specs.
I bought an iPod 7th Gen with a bad headphone jack, along with some replacement parts:
A new enclosure to restore without someone else’s dents and scratches, and because the 7th gen is notoriously difficult to open without damaging the exterior
A black click wheel to shift the appearance to aluminum and black, a configuration not available officially
A hold switch, dock connector, and replacement headphone jack that are all black and replace the white ones
A flashmod board and SD cards to expand the storage to 512 GB
A replacement battery because I didn’t know the age of the old one
Once I got the device open, the process was generally straightforward and now I have a digital music player to use for years to come that will fit my entire iTunes library with room to spare.

The most recent video I directed has premiered as covered on For Folk’s Sake. Watch it over on YouTube!
LED backlit ortholinear keyboard with blue cherry MC switches...
Read MoreThe video for the song "Charlie and Roger," which I directed in January, has premiered on M Music Magazine. Check it out here and read Joe's thoughtful interview:
http://mmusicmag.com/m/2017/03/video-feature-web-exclusive-interview-joe-goodkin/

Still from the music video, "Charlie and Roger."
Joe Goodkin's newest album, "Record of Loss," was released this week. I was honored to collaborate with him again on the music video for the single "Charlie and Roger," which will be released later this month. Check back here for more information, and in the meanwhile check out his album, which is a moving tribute to the people who come and go in our lives.
https://itunes.apple.com/us/album/record-of-loss-ep/id1197360420
There are already reviews coming in as well:
"Heartbreak has no beginning and no end. What Joe Goodkin has done with it is treat it with the respect that it deserves, considering what a sizable role it can play in our lives. He has come up with a song cycle that caresses and soothes the sometimes inevitable pain. In its own way, it is a welcome Valentine unlike any other." https://parcbench.live/2017/02/11/new-folkrock-joe-goodkin-record-of-loss/
http://www.hyperbolium.com/2017/02/12/joe-goodkin-record-of-loss/

It was a privilege to collaborate with the talented Joe Goodkin on the music video for "Dog and Cat" off his new album, "Record of Life."

I wanted to learn more about prop fabrication—namely silicone mold making, slush casting, and vacuforming—so I built a Daft Punk helmet using Volpin Props' work as a general guide.
It took a lot of time to take a bubblegum pink ziggurat and turn it into a hollow helmet, but I'm glad I got the experience of translating raw material into a finished product. I also managed to break even by selling a few casts and visors to cover the cost of materials. A few important things I learned:
Bondo dissolves foam.
Any form of sulphur will interfere with silicone curing.
Slush casts are heavy—The mold and the cast helmet weigh as much as two gallons of water. Imagine lifting and turning that for fifteen to twenty minutes.
You can actually build a vacuformer custom to fit in your oven. It's a very simple machine when reduced to its fundamental components.
I love that magical moment when there is nothing in the world but you and the object and you forget all about the passage of time.
Seriously, don't try this unless you are dedicated to seeing it through because it will take a lot more time than you expect, especially if you are a perfectionist when it comes to details like I am.
For the full gallery, visit the gallery on Flickr:
https://www.flickr.com/photos/127623352@N05/albums/72157663109744740